Wednesday, June 4, 2025

Redline Garage

 As you know, if you've been reading this blog for a while, I collect Redline Hot Wheels. These cars were the first Hot Wheels made, between 1968 and 1977. Of course I try to get cars in good condition, but sometimes you get examples that could use a little help. Case in point, this 1968 Silhouette!

I got this car in a ten dollar bag of "almost good" cars I found on Facebook Marketplace recently. The bag would have been worth much more, had the cars been in decent shape. But, alas, the nicest car is also one of the most common cars out there (a 1970, black interior, Jack Rabbit Special) so it was a "good" buy, but not a great one. Here's the Jack Rabbit...

One of the cars that got closest to being nice was the 1968 Silhouette pictured below. The blue paint was pretty nice, and even the wheel chrome was pretty intact, however it was missing it's bubble windshield and the front passenger side wheel flopped around like a dead fish. Still, there was something to work with there.

I ordered another windshield from an outfit called Second Chance Redlines that makes reproduction parts. It was 10 bucks, so I effectively doubled my investment, but I thought it was worth it. I intended to slide the new glass into place without disassembling the car, but when I got it I found that this was impossible. Also, that floppy wheel really bugged me, so I decided to drill. 

I'll now take you through the process of restoring this car! The fact that we don't have to paint it simplifies things quite a bit, by the way. That would involve stripping off the old paint, buying special Spectraflame paint from The Redline Shop and using an airbrush. I've done it plenty of times, but it's a hassle!

So, here's the car, as found. The new "glass" is there too. You can see how that front wheel is sticking way out at a weird angle.

Flipping it over, we see our targets. The two silver rivets; one in front and one in back. They are all that's holding the car together.


Our handy-dandy drill will take care of them, though! Starting with the smallest drill bit I own, I carefully drill guide marks on each rivet...


Then, once I have a spot to place the tip of the drill, I go to a larger bit to start really removing rivet metal. 


Once the rivet heads are gone, the car pops apart easily! (The wheels pop off and on easily too)


And here is the problem with that front wheel! You can see the wire on the right has come out of the guide pin. The wire on the left is what its supposed to look like. Fortunately, a little spot of CA glue fixes it right up!


Here we have the parts of the car (sans glass).


So, I'll set the glass in the body...


Next, the chrome plastic engine and side pipes go in...


...followed by the interior...


Here's a good shot of the fixed right front wheel. CA glue (commonly just called "super glue") works great! Especially when you hit it with a little accelerator ("Zip Kick")


The body and chassis are put back together. A dot of CA is placed on each rivet hole and hit with Zip Kick...


And then you wait a few seconds for everything to set! This is a good shot of all the tools used on this project. The funny shaped metal object on the bottom right is a special wheel straightener. The bottle on the top right is the Zip Kick. The CA glue is on the bottom left.


And here we have the finished car! 


Now, it must be noted that since this is now a "restored" car, it's worth about half of what an untouched car in the same condition would be worth. Still, I like making them like new again, and it displays pretty well!

So, there you have it! Now you can fix a Hot Wheels Redline! Or at least you know how it's done!

Until next time, keep searching for treasure!

Tuesday, May 27, 2025

Still Workin' on the Railroad!

This week we continue our look at cool model railroading stuff that I have laying about! I bought a tub full of HO railroad stuff about five years ago, and this was in it! 


Yes, it's another Tyco item! The "Operating Floodlight Car!" Let's open her up, shall we?

And there she is! In mint condition too! In fact, she looks so good that I always just assumed that she worked. In all these years, I'd never tested her! So, for this post, I grabbed a section of track and a 9 volt battery and gave it a whirl....


Whattayaknow? She works! 

Now, for completeness, the back of the box...


All sorts of neat-o stuff!

Then, I got to thinking... I've never actually seen a train car like this out in the wild. Do railroads really use these? Have they ever? A quick question to my favorite AI search engine provided this answer...

"Floodlight cars, as depicted in model railroading, are largely a creation of toy train and model railroad companies like Lionel, Bachmann, and TYCO, designed to add visual appeal and functionality to model layouts. These cars, often equipped with swiveling or rotating lights, are marketed in various scales (e.g., HO, O, S) and branded with railroad names like Union Pacific, Amtrak, or Pennsylvania Railroad.However, there’s little evidence that dedicated "floodlight cars" were widely used by real railroads in the way they’re portrayed in model form. Some sources suggest railroads employed specialized equipment, such as cranes with attached floodlights for wreck recovery or maintenance work, as seen in a salvaged Norfolk Southern RR wreck car crane with articulated lamps. Additionally, road-rail vehicles or maintenance-of-way equipment might include lighting for nighttime operations, but these are not standalone "floodlight cars" as modeled.The concept seems to stem more from the creative liberties of model manufacturers than from widespread historical or operational use in actual railroading."

Well, there you have it, I was right. The "floodlight car" is more toy than prototype. I think Lionel must have produced the first one and other companies followed in the later years  still, it's a pretty cool item, and I'm sure it looks cool going around the track.

That's it for this week! Until next time, keep searching for treasure!

Thursday, May 22, 2025

Workin' on the Railroad!

 One of the coolest things about a train layout is when you have pieces that actually work like the prototype they model. Or at least kind of, sort of, work like the prototype...

Lionel was big into these types of accessories, but when HO took the model train world by storm in the '50s, the accessories were scaled down as well. 

Our little item this week is from the '70s. Tyco was the king of entry grade HO model trains back then, and they offered several accessories to spice up a young modeler's layout. I picked this one up off off Facebook Marketplace a few years ago. The Tyco Freight Unloading Boxcar!

Here is the box, in all it's brown border glory! Tyco collectors love the brown border box era. As you see, it states that you can unload the crates by remote control!


Looking inside, we have a Burlington boxcar (which really can be hooked up to your train and run on your layout) and some little brown plastic crates. Ten of them, to be exact. This example has all of its crates, which I'm told is rare. I'm sure those tiny things got sucked up in vacuum cleaners and chewed on by playful puppies all the time!


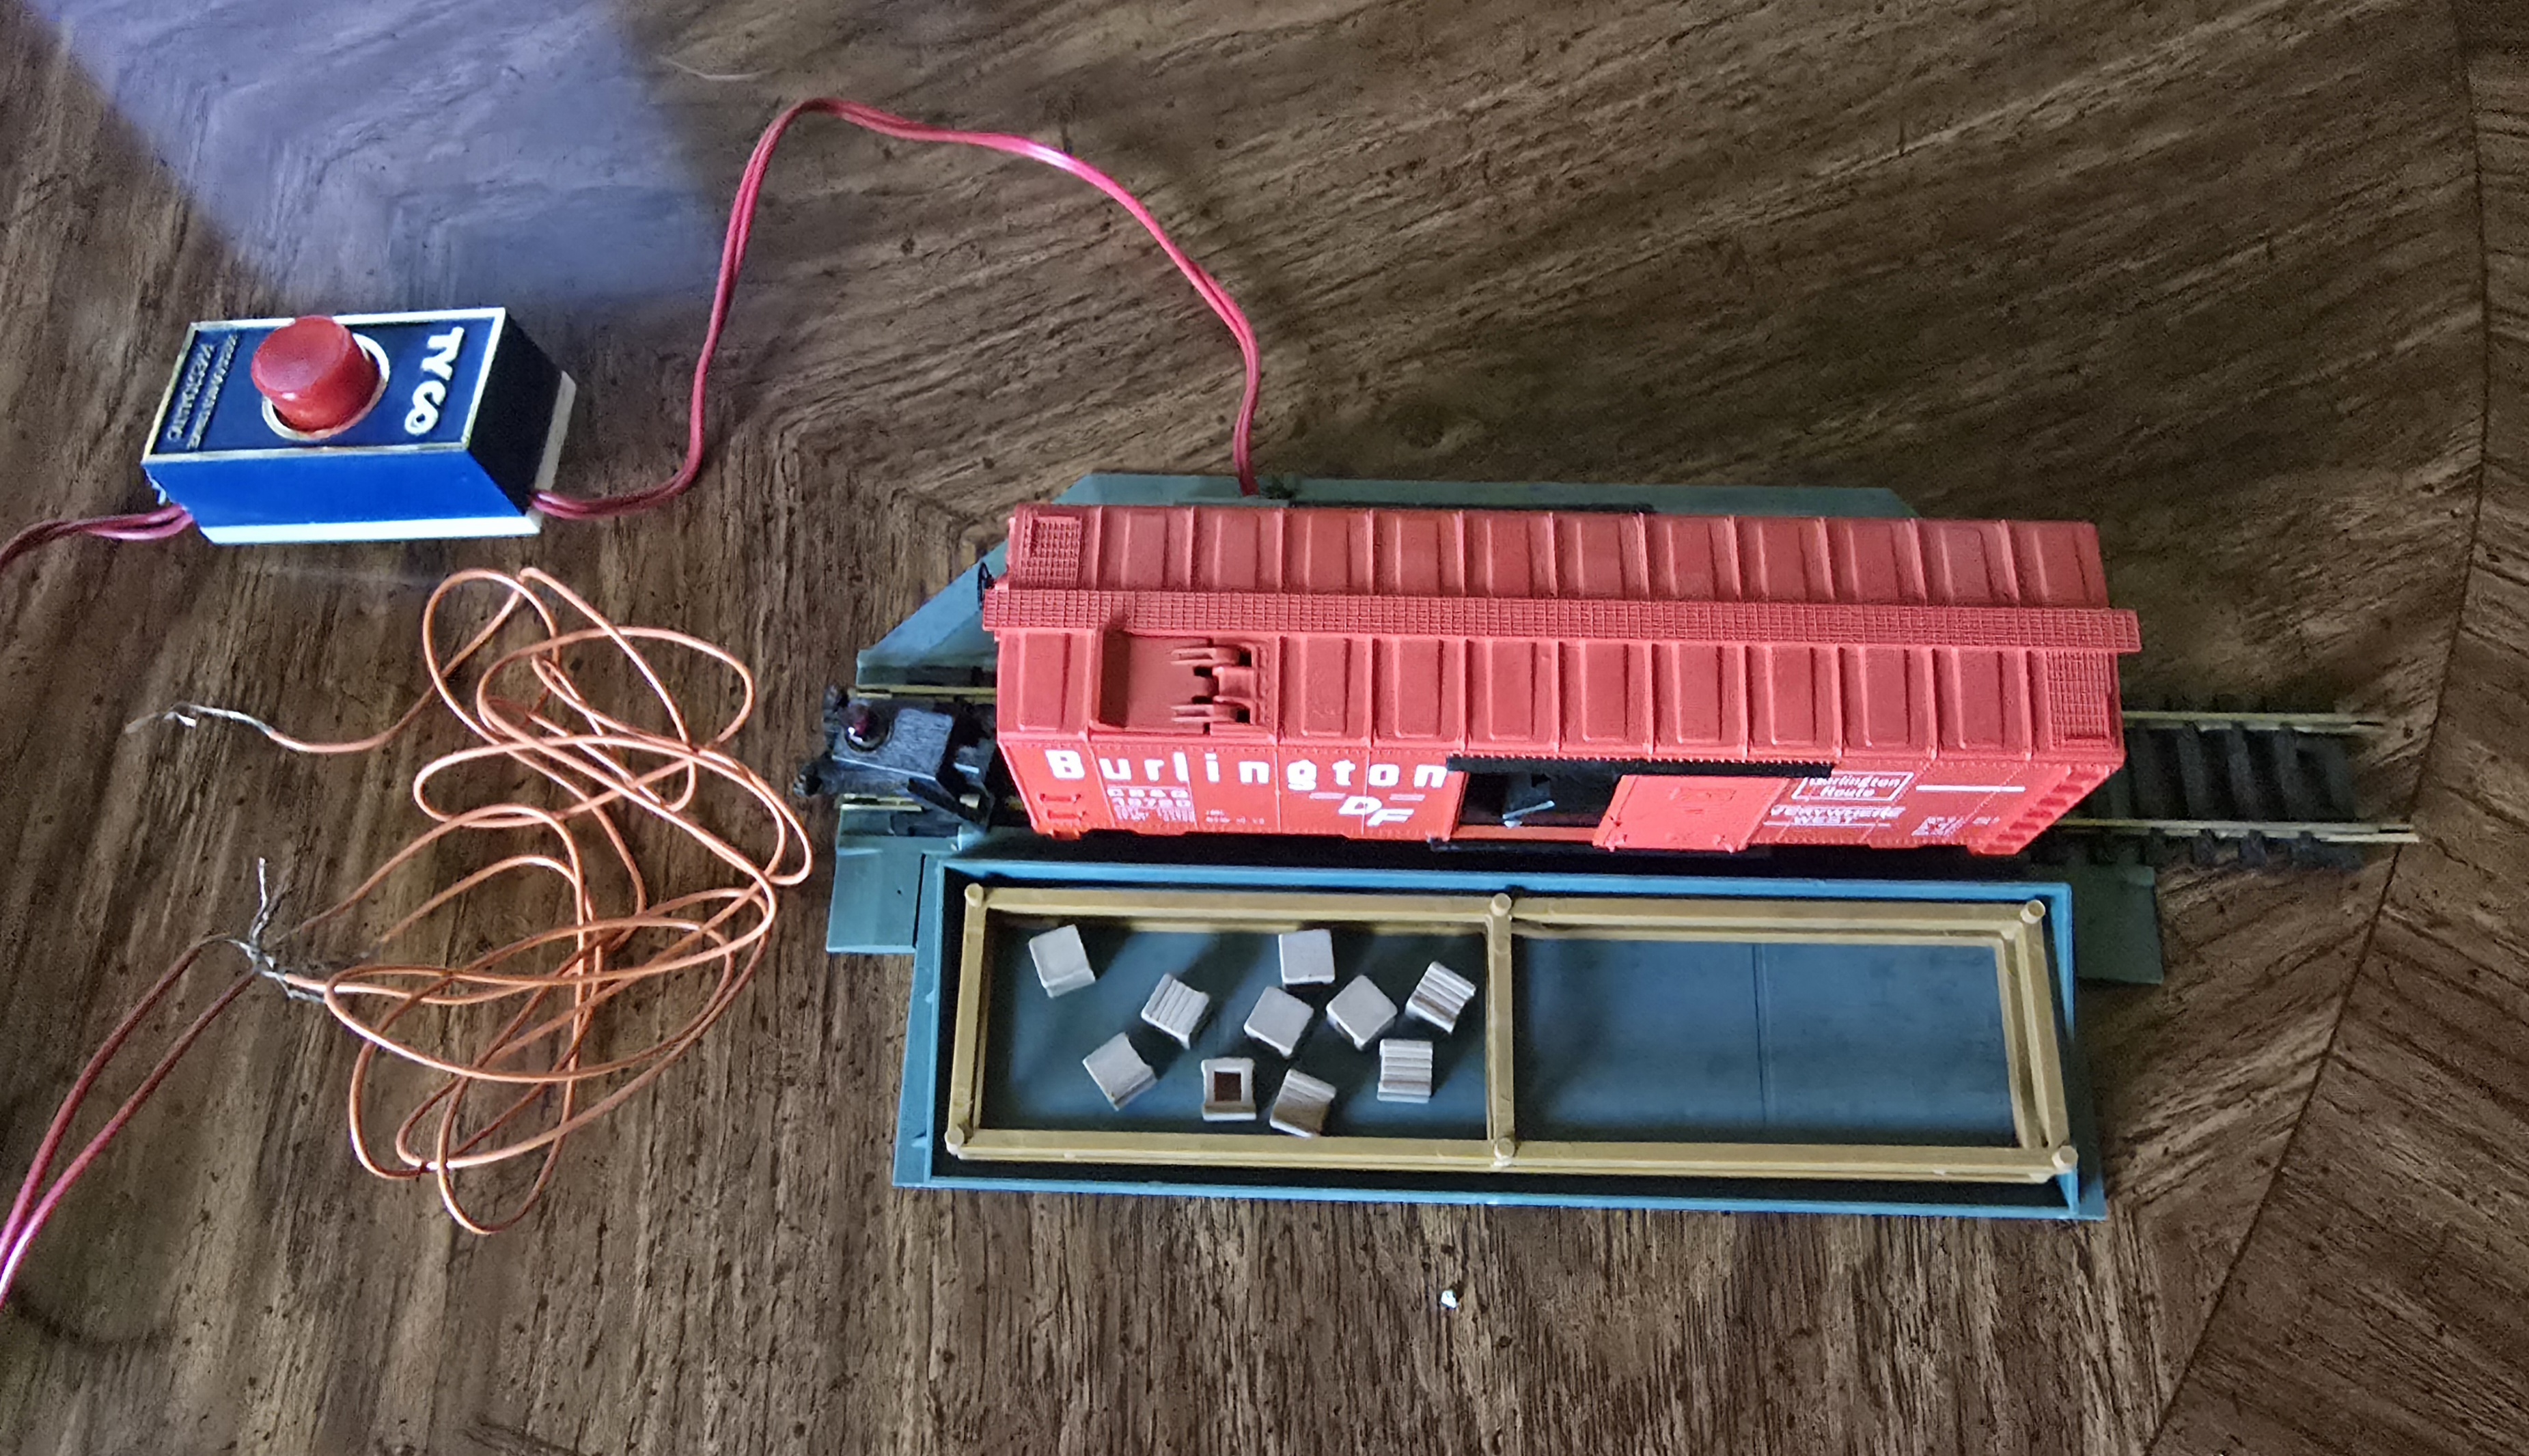
Upon opening up the box above the train car, we find the rest of the set. This includes the track and siding where the crates are tossed. And, of course, the remote control button!


Here is what it looks like set up. The button fires a servo which flicks the little plastic boxes out of the train car and into the corral area. It's pretty violent! I hope grandma's good china isn't in one!


Here's a shot of the little men inside the car. 


How do those boxes get into the boxcar? Why, though a hatch in the roof, of course!


On the back of the box we have a list of other train accessories with a little extra going on with them. I actually have a couple...

And there you have it! My example of this set is pretty much mint, so I'm fairly sure it wasn't played with much. And actually, even as cool as this idea seems at first, I don't think someone is going to sit there are run it over and over and over...

By the way, there is apparently another version of this kit that features a U.S. Mail car. 

Until next time, keep searching for treasure!

Tuesday, May 13, 2025

Rocketing on Land!

 The year was 1975. Estes model rocket company had bought out another hobby rocket company called Vashon a couple of years earlier. Vashon's rockets differed from Estes' in that they used reusable motors that were filled with Freon for propulsion. Estes used black powder single use motors. 

For a while, Estes marketed both types of rockets, dubbing Vashon's kits as "Cold Power." During this time they realized that the Cold Power technology made an idea that many kids had been toying with actually safe; rocket cars!

I bought one at a local hobby shop about that time. I built it (which was fairly easy) and went to the Park and Ride lot across ftom our apartment. I nailed the guideline down, filled the aluminum motor with Freon and let her rip! It really moved! And after I picked it up, I noticed the motor was all frosted up. Cold Power indeed!

Flash forward 50 years. My Land Rocket is long gone. Every now and then I search for one on eBay, but there are almost none. You see, they didn't sell them for long (only one year) and they didn't sell that many (hence, only one year). Then I see one pop up on Facebook. For five bucks!!! I quickly messages the seller and after a few hours I owned a new old stock, never used, Estes Screamin' Eagle Land Rocket just like the one I had as a kid! Here it is!


The box is probably the weakest part of the purchase, but it still displays well!


Upon opening it, you find the very lightweight and completely unused parts...


This was the downfall of the whole Cold Power line- Freon. Once it was outlawed by the EPA, there was no more fuel for these beasts. I happen to now own a 50 year old full can. (Don't tell anyone!)


The "motor" is pretty much an aluminum tube with a nozzle. It actually does provide a good amount of thrust when venting the Freon...


Here we have bits that I'm surprised survived. The nail was to anchor the guideline, which is on the spool. The foam disks are the tires (these are usually rotted away, but other than a dented one, mine are in good shape). The clipped disk protects your hand when launching.


The body of the car is very lightweight vacuformed plastic. It has to be trimmed when building, which mine hasn't been.


The chassis and wheels are heavier plastic.


The parachute is standard Estes parachute plastic, printed with a drag chute on it. You also got decals!


And here we have all the paper work...and there's a lot of it! I'll let you look at your leisure...


Finally, we have the sides of the box, just for completeness...


So there you have it! I won't be building it, since a kit in this condition can go for a hundred bucks, on up. I think this one survived in someone's garage for 50 years. Now it will have a prized position on my shelf! 

Until next time, keep searching for treasure!


Tuesday, May 6, 2025

Stayin' Alive, Stayin' Alive!

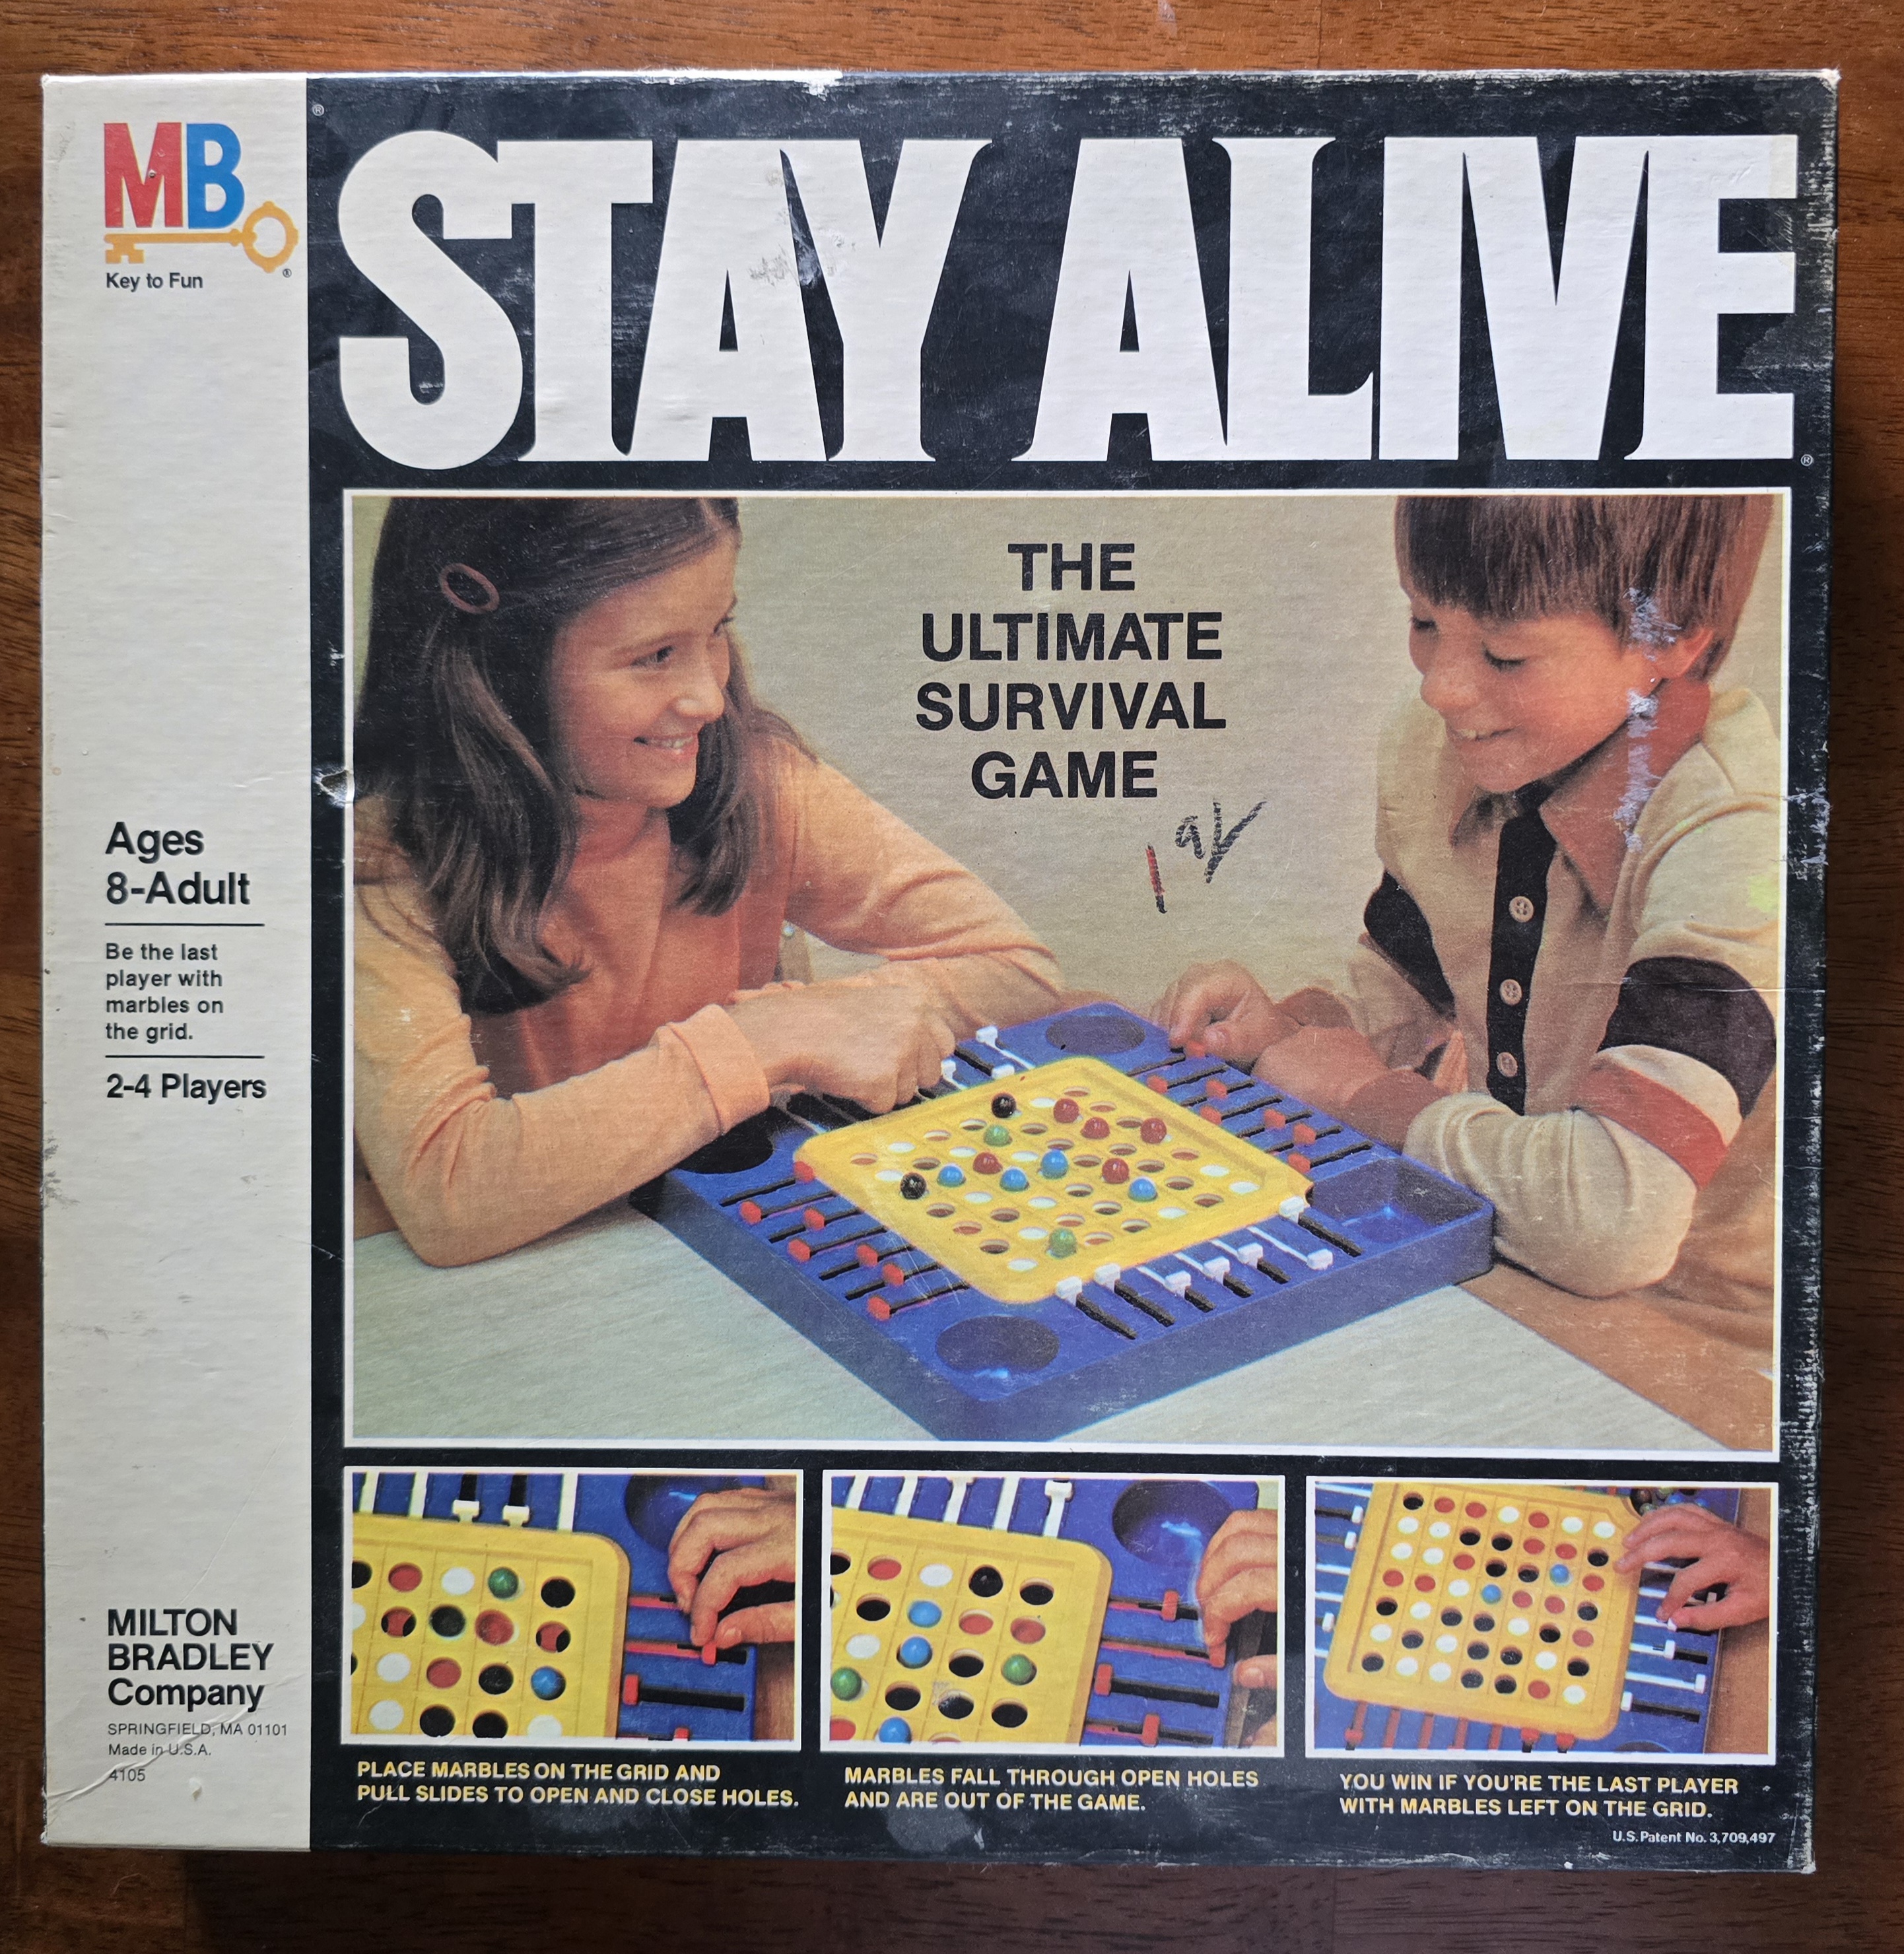
 Now that I have the Bee Gees stuck in your head, let me introduce our item for today! From 1978, I have Milton Bradley's "Stay Alive" game! I picked this one up at a thrift store that loved to use those horrible grease pencils to mark their prices. Still, it's not a bad example. Here you go...

Apparently I spent 1.91 on this gem. Kind of an odd number, but it probably made some sort of sense to the store. I see by the copy that this is the "Ultimate Survival Game" which means those guys on that TV show are a bunch of dummies. Why eat bugs when you can just play this? Suckers!


And opening it up, we see the board. This game could be played without taking it out of the box, if you wished, but that's not as fun in my opinion. Anyway, that's a lot of plastic! 


Here are the instructions. The game is very simple. You just place your marbles on the board and then take turns moving the slides until only one marbe remains. There is a little thought that can go into it, since you can easily figure out where the holes are on the slides, but since you're taking turns it's hard to set yourself up. 


Here is the board, freed of the box. It just looks better that way, I think 


This is a game that I never had as a kid, but was fairly popular. It's fun, but it's not my favorite. I guess never having played it as a kid, I don't have that nostalgic factor. 

Interestingly enough, I remember the commercial far better than the game. In fact, I quoted the last kid's line before he said it when I was watching it on You Tube, which is a little scary.

You wanna see the commercial? Here you go!

Commercial!

So there you have it! Have a great week and try to Stay Alive!

Until next time, keep searching for treasure!

Tuesday, April 29, 2025

Closer to the Breaking Point


 This week we have a very simple game from 1976. Ideal's Breaking Point! Let's take a look, shall we?

The box illustration pretty much sums up the idea. You put the little balls on top of the big balls and try not to dump the little balls into the tray area. This girl seems to not quite grasp the concept, as she's apparently excited to have just lost. 


And here we have the actual game. One thing that I found interesting (because I'm easily amused) is that the colors on all of the parts are reversed from the box illustration. Apparently the illustration photo was taken in an alternate reality. I'm surprised the girl doesn't have a beard like "Mirror Spock." (Deep dive for nerds. You're welcome)


And here are the (pretty crumpled up) instructions!


The first three pages are all game description and assembly instructions! Yay!


Finally, on the last page, we get to how to play. It's very simple. In fact, when I was setting up the game to photograph it, my wife said, "It's like Jenga!" I hadn't thought about it that way, but she's right. I do like how you use the little stick to place the balls. 

So, is it fun? Yeah, it is. It's not my favorate game, but it's got some playability to it. I'll keep it sitting up on the ol' game shelves, I guess. 

I really don't remember where this one came from. I didn't have it as a kid, and I can't remember buying it. I sort of remember it being thrown in with my eBay Sub Search purchase (with that blockbuster game, Recall!) but I'm not sure.

Anyway, like I said, I'll hang onto it.

Until next time, keep searching for treasure!